SSO Configuration via ADFS
On-Premises or Cloud
You can configure SSO for both the cloud and on-premises versions of YuChat. The first half of this guide covers on-premises setup; the second half covers cloud.
On-Premises: Prerequisites
You'll need:
- Microsoft Windows Server 2019 with AD and AD FS already configured
- A YuChat Keycloak server (included in the deployment package)
HTTPS must be configured on both services:
- AD FS at
https://fs.domain.com - YuChat Keycloak at
https://kc-yuchat.domain.com
AD FS and Keycloak both require valid public certificates.
Use a dedicated Keycloak realm for AD FS SSO.
Adding Keycloak as a Client in AD FS
AD FS will act as the trusted identity provider, so Keycloak must be registered as an OAuth 2 client. Register Keycloak by creating an Application Group in AD FS — Application Groups define the protected resources and the clients that can access them.
OAuth defines two client types: public and confidential. Public clients run on end-user devices (for example, browsers on desktops or phones); confidential clients run on a backend. Microsoft calls these native and server applications, respectively. This integration uses a server application.
Keycloak receives an ID token from AD FS and builds a user identity from the token's claims. Some of the data Keycloak needs isn't included in the standard ID token, so you also need to configure custom claims by creating an API inside the Application Group.
Create the Server Application in the Application Group
In AD FS, open Application Groups and choose Add Application Group… from the context menu.
Adding server to adfs

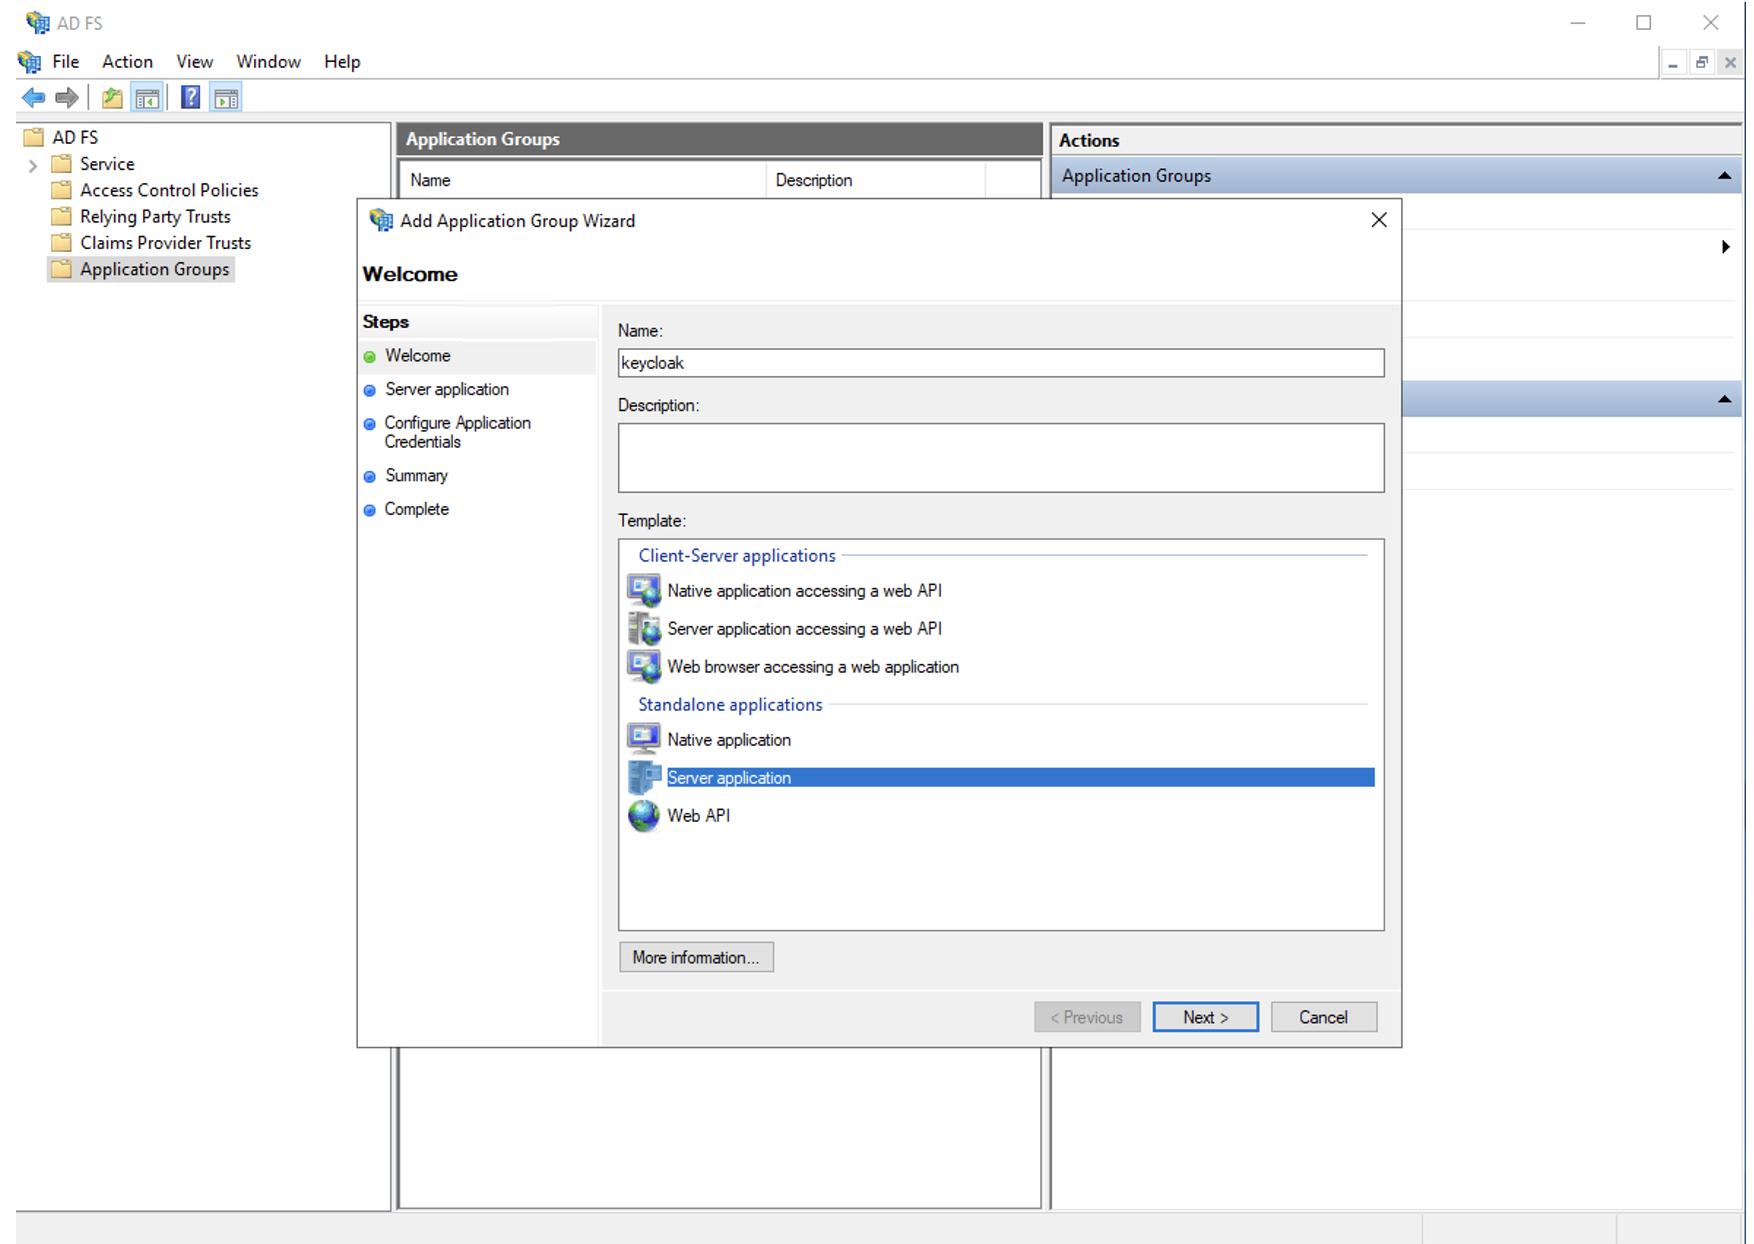
Use these settings:
- Client Identifier: keycloak
- Redirect URI: https://kc-yuchat.domain.com/auth/realms/yuchat/broker/ADFS/endpoint — replace with your realm
- Credentials: Generate a shared secret — save it, you'll need it later
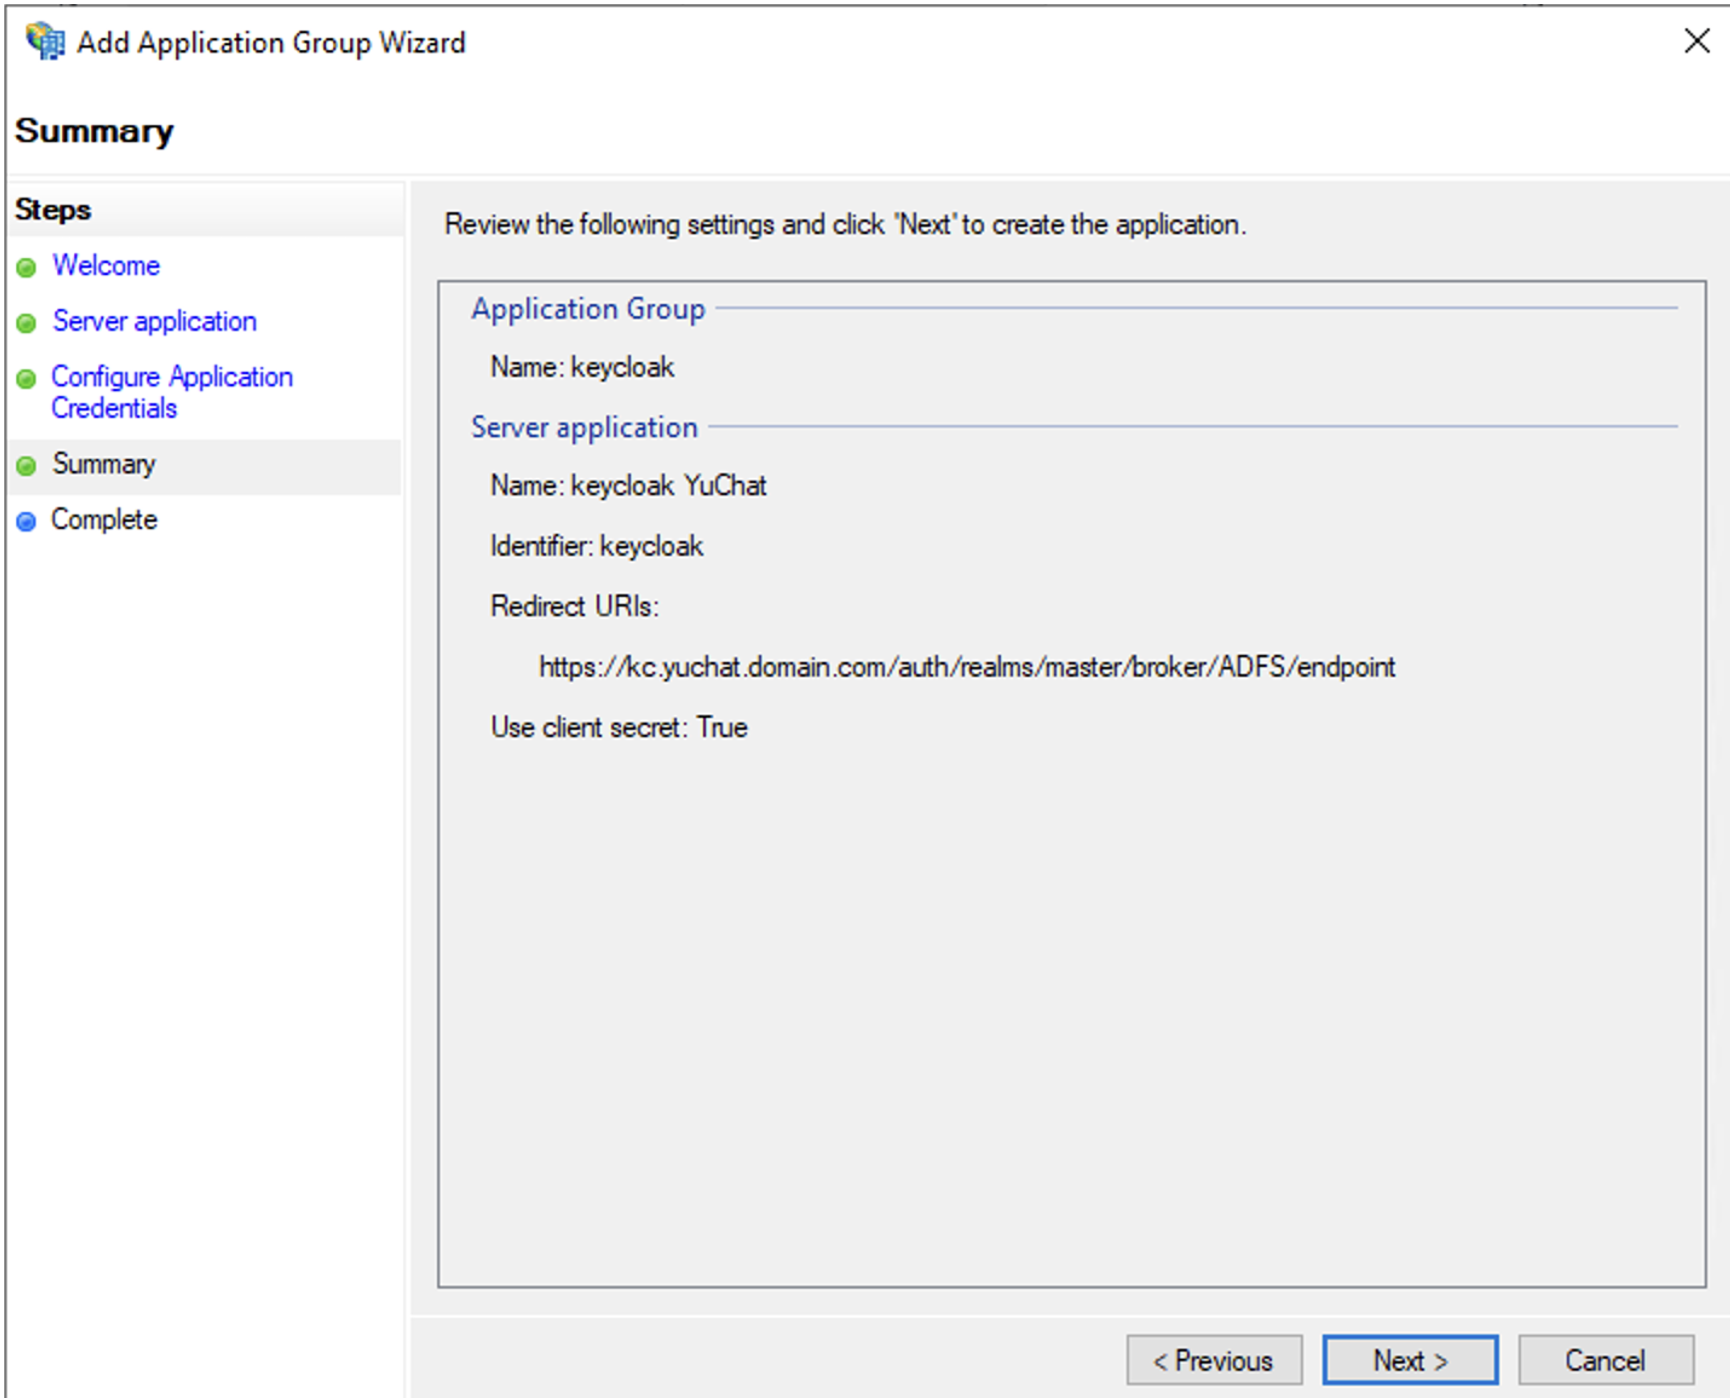
The redirect URI changes if you create additional Keycloak realms. You can verify the URI later, when configuring Keycloak. Confirm the settings and finish creating the application.
After setup, the keycloak application appears in Application Groups.
Adding server to adfs - result
Create the API
Create a server API to control the token AD FS returns to Keycloak. Double-click keycloak in the Application Group folder and choose Add application….
Adding api to adfs
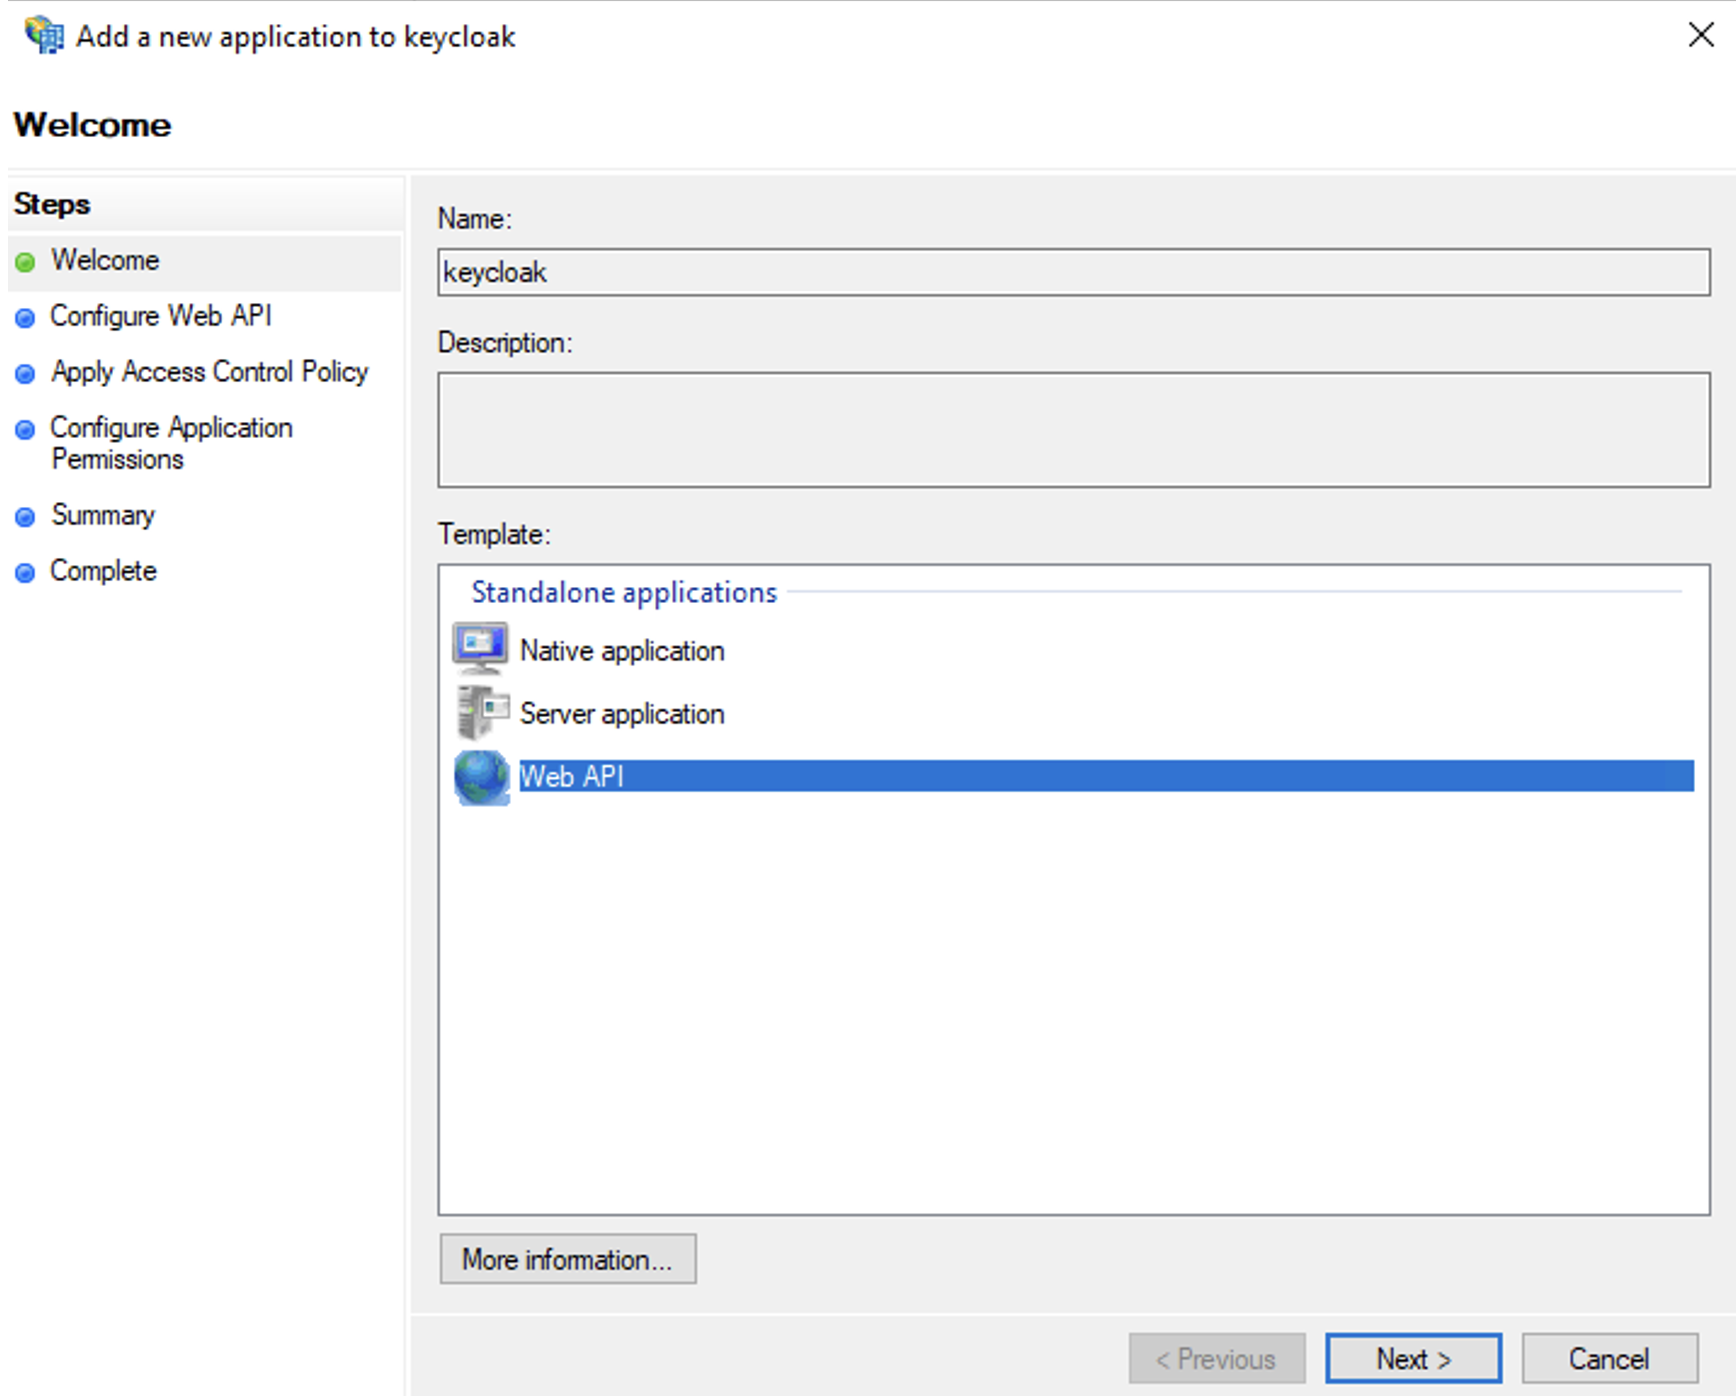
Use these settings:
- Name: keycloak - API (or any name you prefer)
- Identifier: keycloak (must match the Client Identifier from the server application)
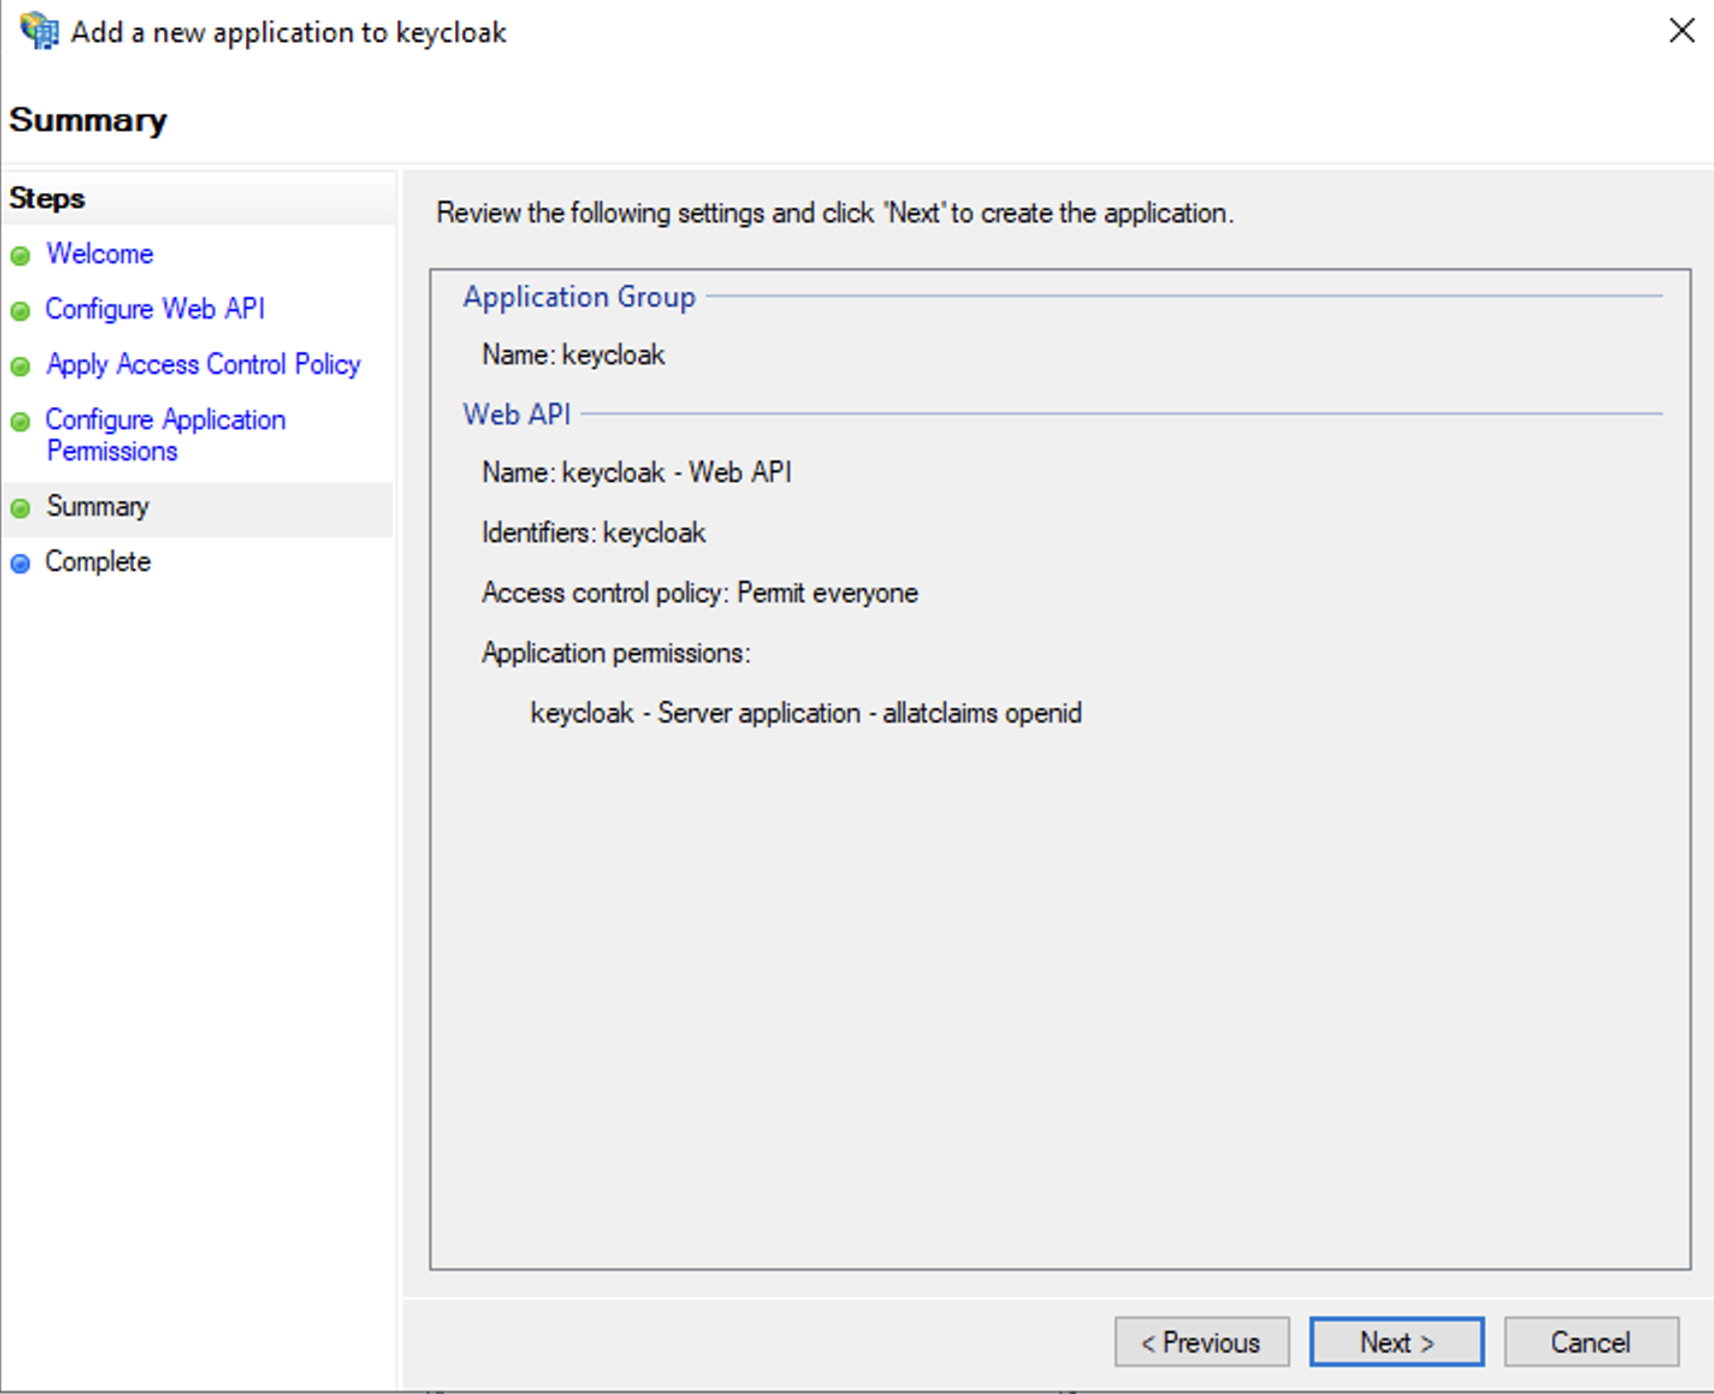
- Access control policy: Permit everyone
- Permitted scopes: select allatclaims in addition to the default openid
The allatclaims scope copies every field from the AD FS access token into the ID token sent to Keycloak.
Confirm and finish setup. The new API appears under the keycloak server application.
Adding api to adfs - result
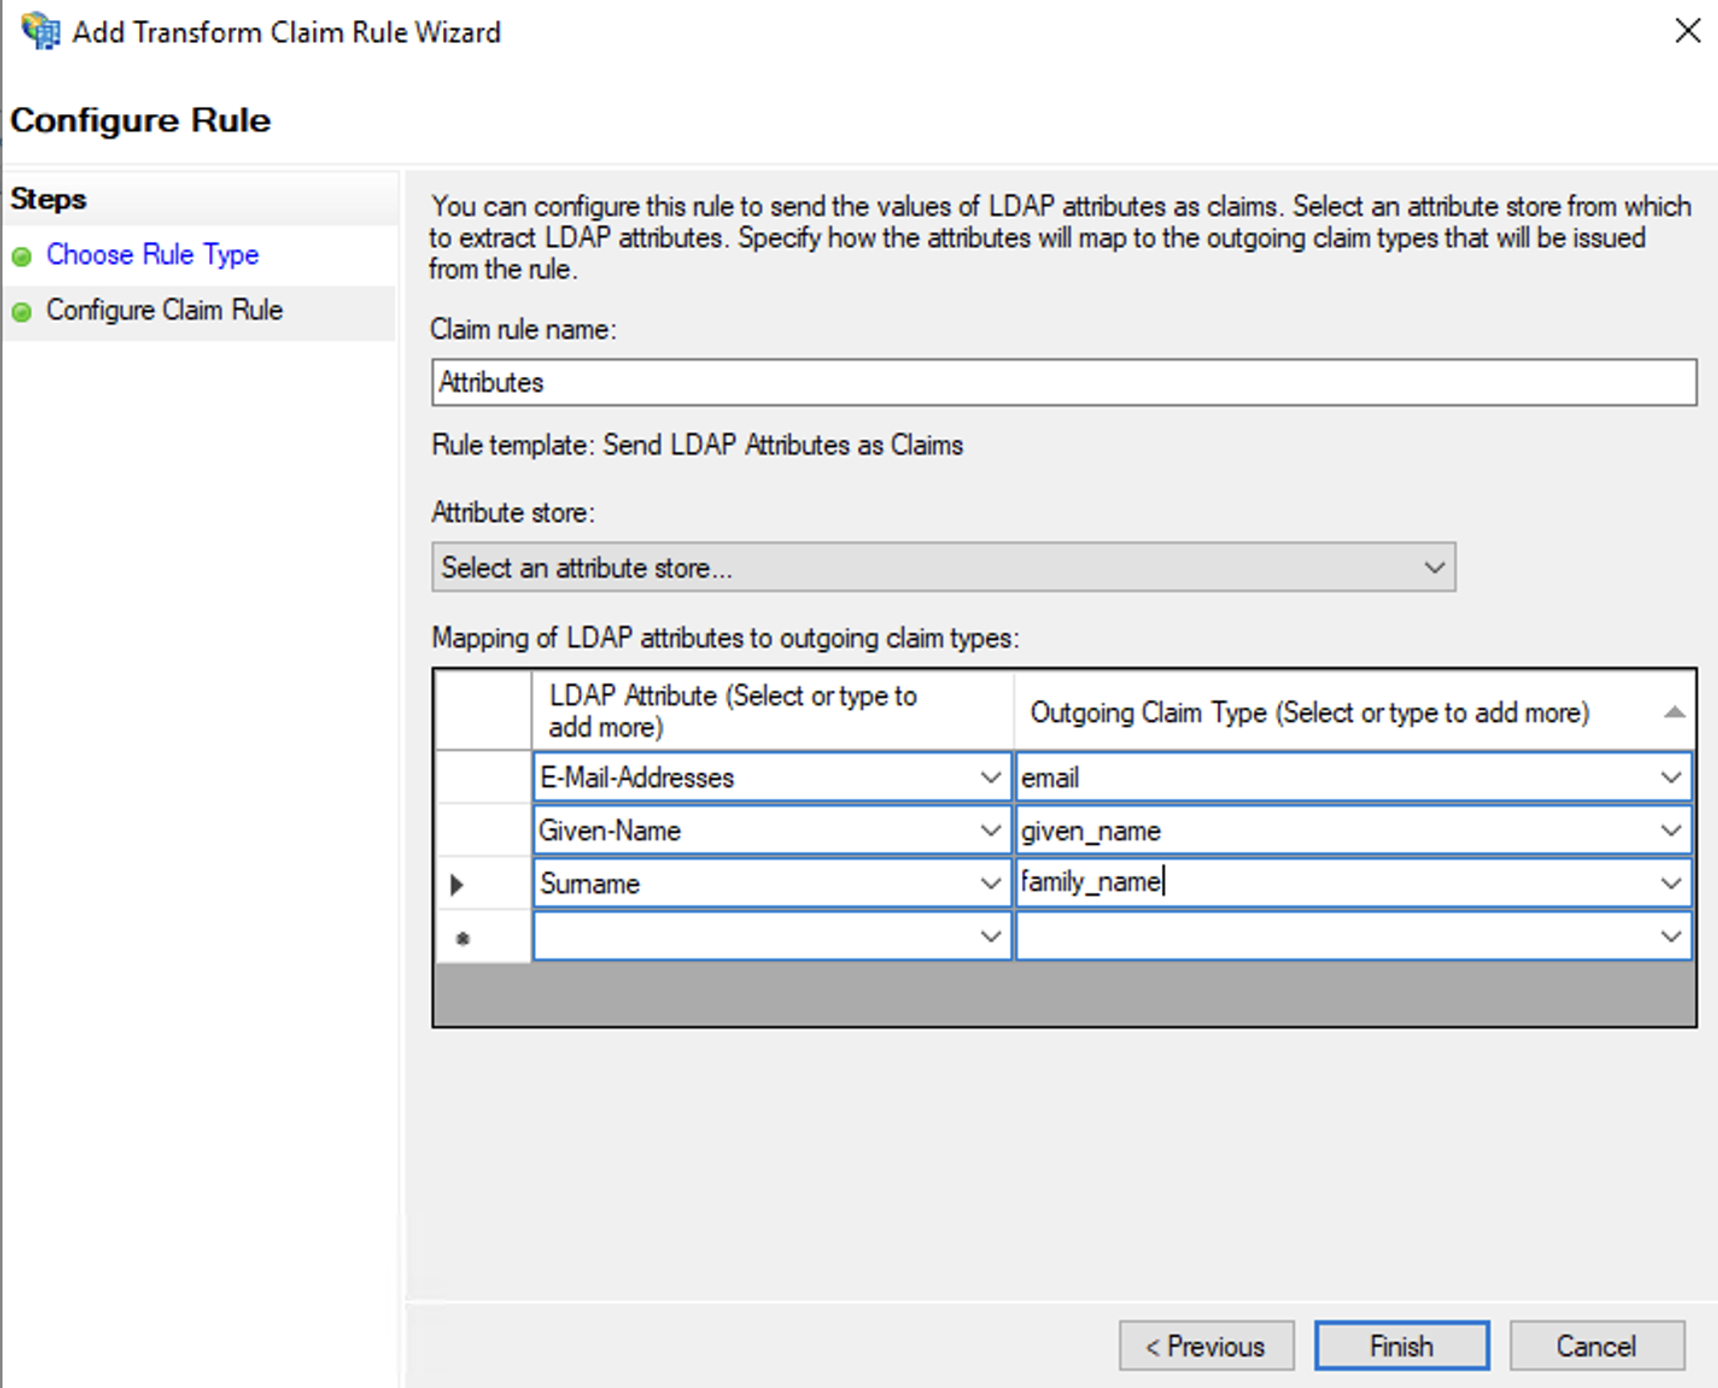
Configure Data Field Mapping
The AD FS configuration is almost ready. To identify users correctly in YuChat Keycloak, map the following fields: email, given_name, and family_name. Because allatclaims already passes every field, these values will be present in the ID token sent to Keycloak.
Open the keycloak server application and double-click keycloak - Web API. Switch to the Issuance Transform Rules tab and click Add Rule…. Use the Send LDAP Attributes as Claims template to forward the fields.
Use these settings:
- Claim rule name: Attributes (or any name you prefer)
- Attribute store: Active Directory
- Mappings:
- E-Mail-Addresses → email
- Given-Name → given_name
- Surname → family_name
The values email, given_name, and family_name aren't in the dropdown — type them manually.
Adding field mapping in adfs
You can add more attributes if needed. The mappings above are the minimum required for YuChat. They're used to generate a username automatically on first sign-in.
Adding AD FS as an Identity Provider in Keycloak
Keycloak is now registered as an AD FS client. Next, configure Keycloak to use AD FS as its primary identity provider for YuChat.
Import the AD FS Configuration into Keycloak
- In the Keycloak admin UI, open your realm and add OpenID Connect v1.0 on the Identity Providers tab.
Adding openid provider to keycloak
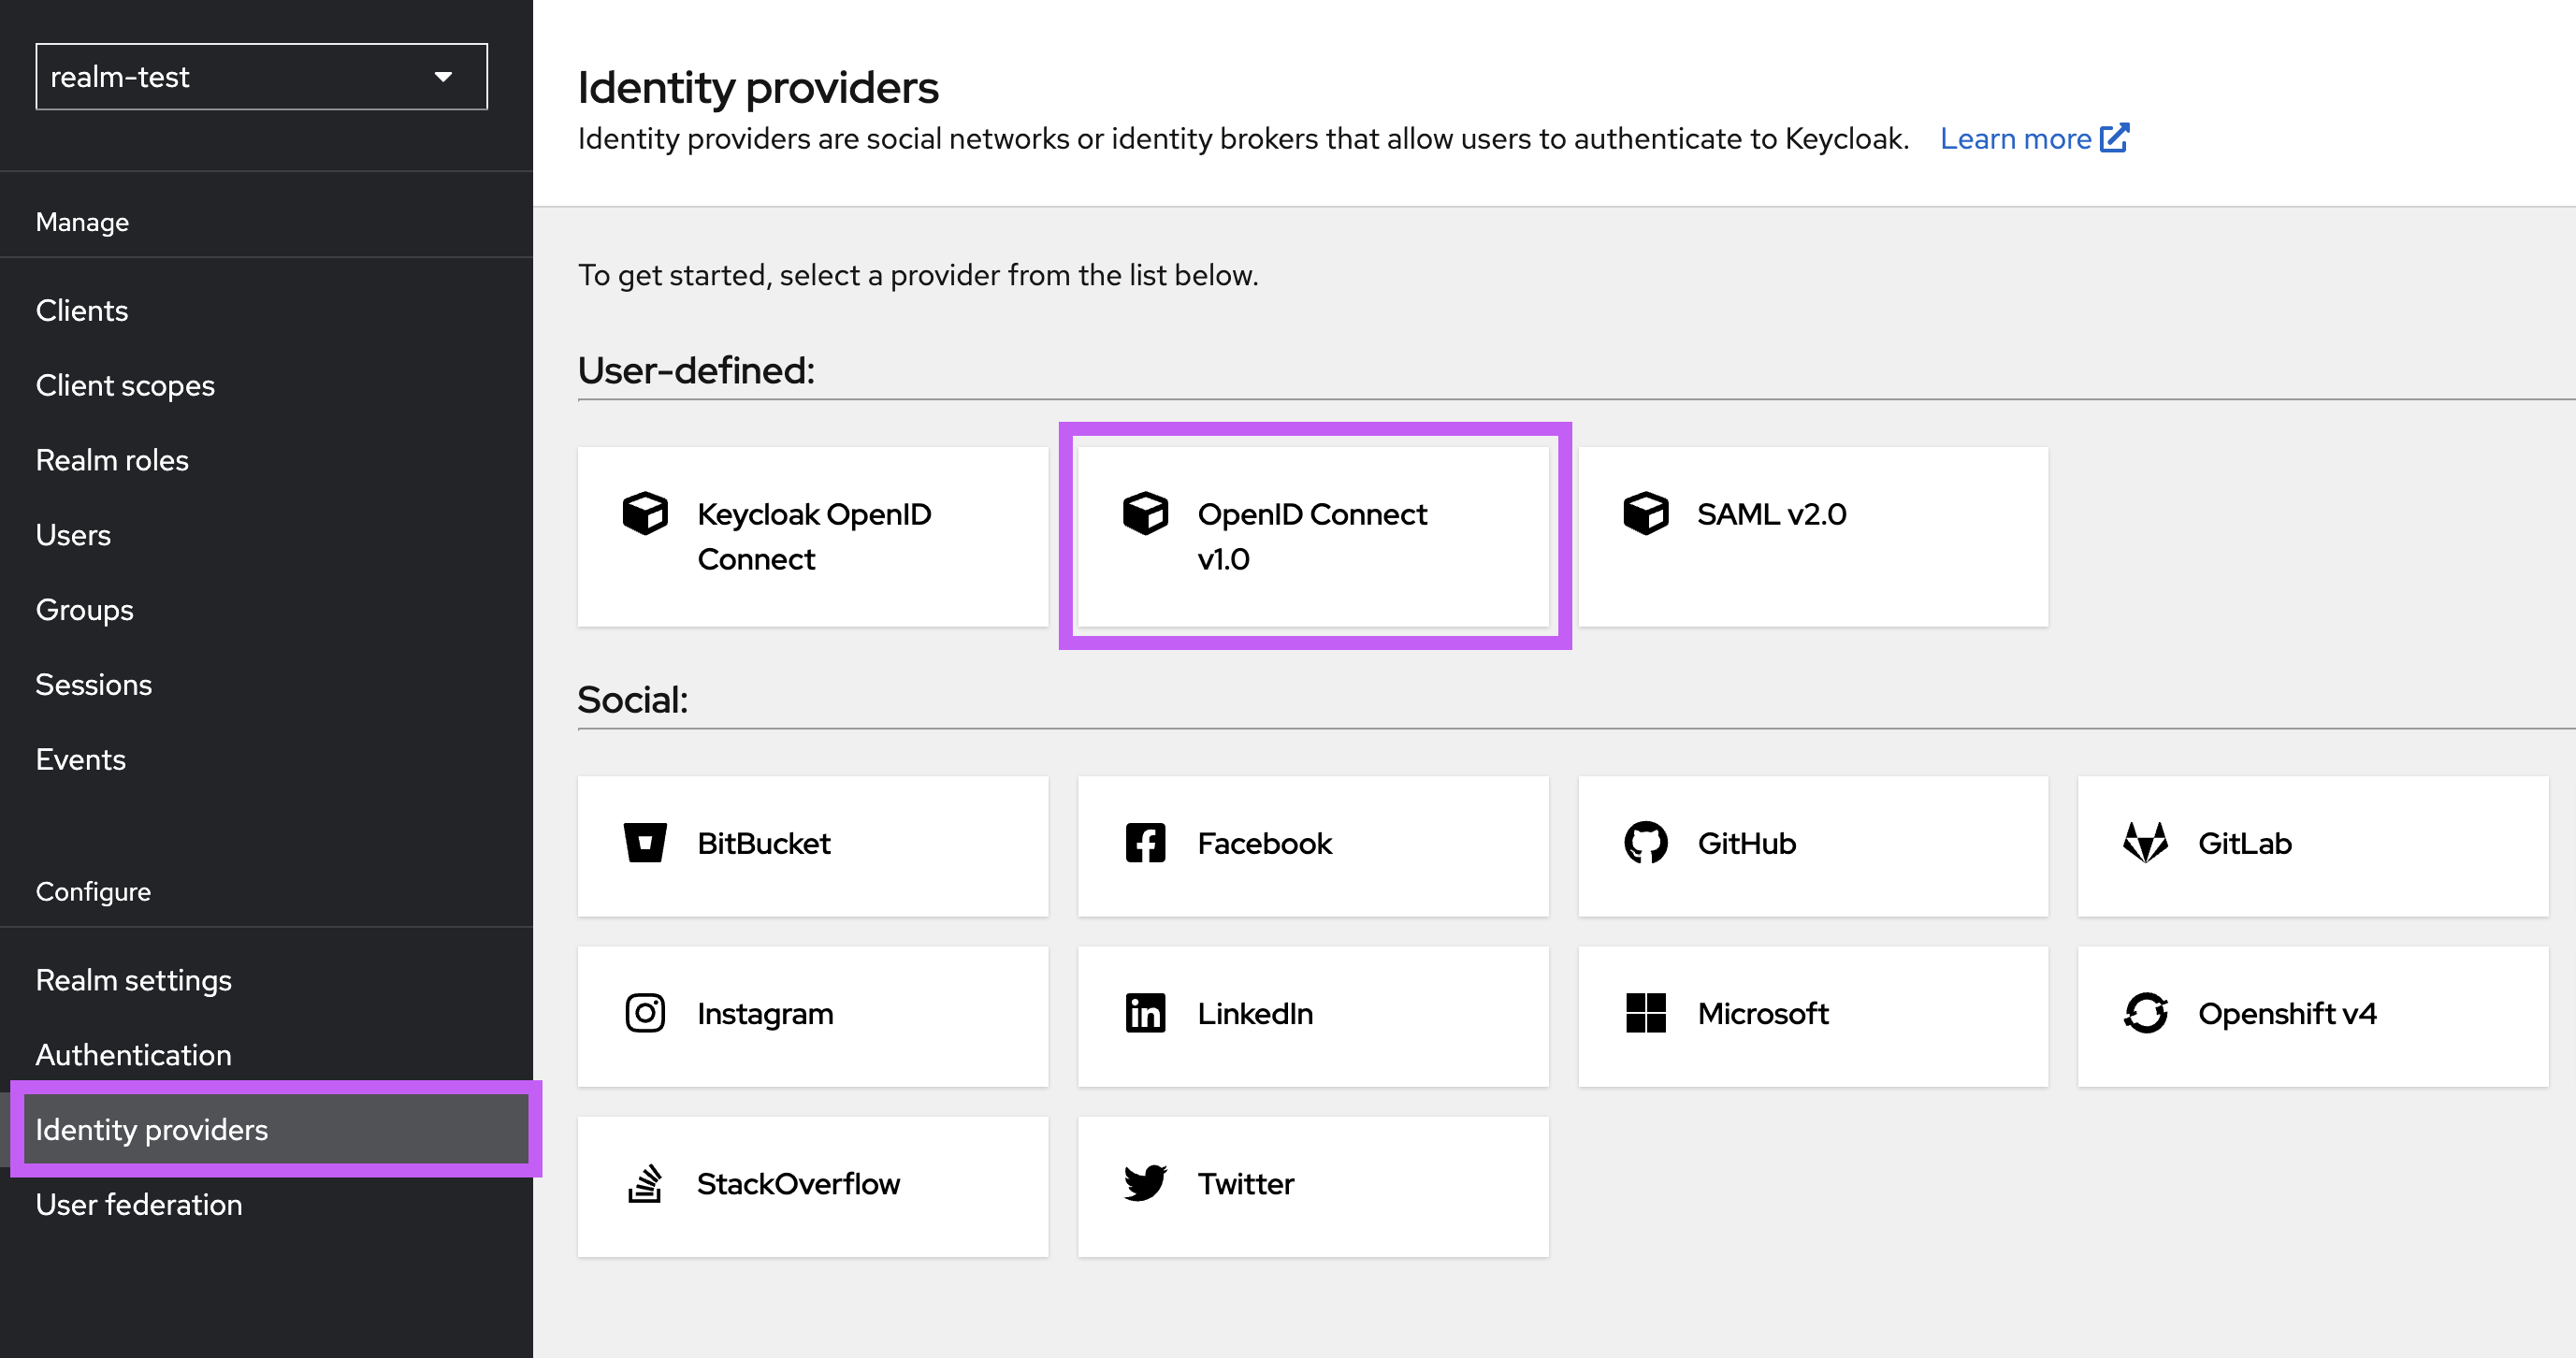
- In the Discovery endpoint field, enter the OpenID Connect provider URL for your AD FS. You can verify it by sending a GET request with any HTTP client (browser, curl, or Postman); the response should be a JSON document.
curl https://fs.domain.com/adfs/.well-known/openid-configuration
- Set the following values:
- Alias: ADFS (used to build the redirect URL)
- Client ID: keycloak (must match the Client Identifier in AD FS)
- Client Secret: the shared secret you generated when creating the AD FS server application
Save the identity provider.
- Re-open the provider and configure:
- Disable User Info: ON
Turn this on because the token has already been customized on the AD FS side before it reaches Keycloak.
Re-check all redirect URIs in Keycloak — they must match the AD FS settings — and save.
Configure Field Mapping in Keycloak
Keycloak receives data from AD FS and stores it locally before passing it to YuChat. To authorize users correctly and display their names, configure attribute mappers.
Open the provider you just created, switch to the Mappers tab, and add three rules of type Attribute Importer:
- email → email
- given_name → firstName
- family_name → lastName
Adding mapping to keycloak

Configure End-to-End SSO via AD FS
Keycloak is YuChat's single point of authorization. You can also enable end-to-end SSO via AD FS by creating a custom browser authentication flow.
Don't enable this flow until all users who need SSO have been migrated to Keycloak.
Until migration is complete, keep the standard browser flow with the login form and don't make Identity Provider Redirector mandatory for everyone. Otherwise, users who don't yet exist in Keycloak won't be able to sign in via SSO.
- Open the Authentication section.
- Duplicate the existing browser flow — click the three dots at the end of the row and choose Duplicate.
- Name the new flow (for example,
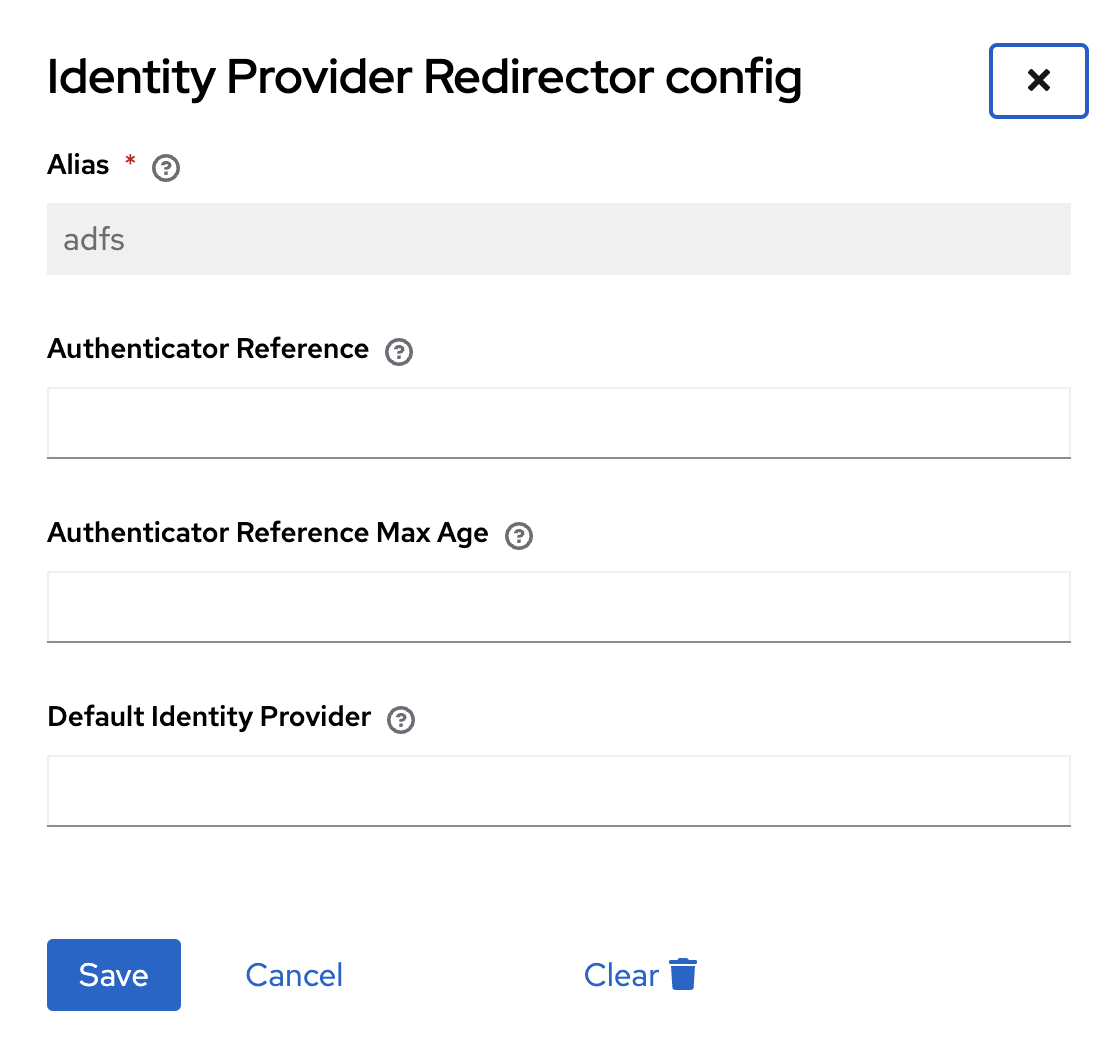
yuchat-adfs-flow) and open its settings. - Configure Identity Provider Redirector (click the gear icon on the row) and enter the alias you created during Keycloak import. redirect to adfs
 tip
tipEnter the identity provider name in the Default Identity Provider field.
noteThe Default Identity Provider field is case-sensitive — use the same casing as the alias on the identity provider.
- Mark the redirector as Required.
- Remove the Username, password, otp and other auth forms step from the flow.
authentication settings

Once applied, clicking Sign in via SSO in YuChat takes the user straight to the AD FS sign-in page. If the user is already signed in to AD FS (for example, via Outlook Web), they're redirected directly into YuChat — even on first login.
Combining SSO with User Migration to Teams
To migrate users into existing teams (for example, based on AD FS groups), add LDAP user migration to the same realm used for SSO.
Before enabling this scenario, complete the initial LDAP to Keycloak migration and verify that all users who need ADFS sign-in already exist in Keycloak.
Do not enable the transparent/browser SSO flow before migration is complete. Users who do not yet exist in Keycloak will not be able to sign in via ADFS SSO.
The consequences of changing User LDAP filter and the LDAP sync scope are described in Keycloak Integration.
Configure field mapping from LDAP/ADFS at the LDAP level.
-
Set up LDAP user migration with field mapping.
noteThe LDAP migration and the AD FS Identity Provider attribute mapping must agree —
usernameandemailmust be configured the same way in both. -
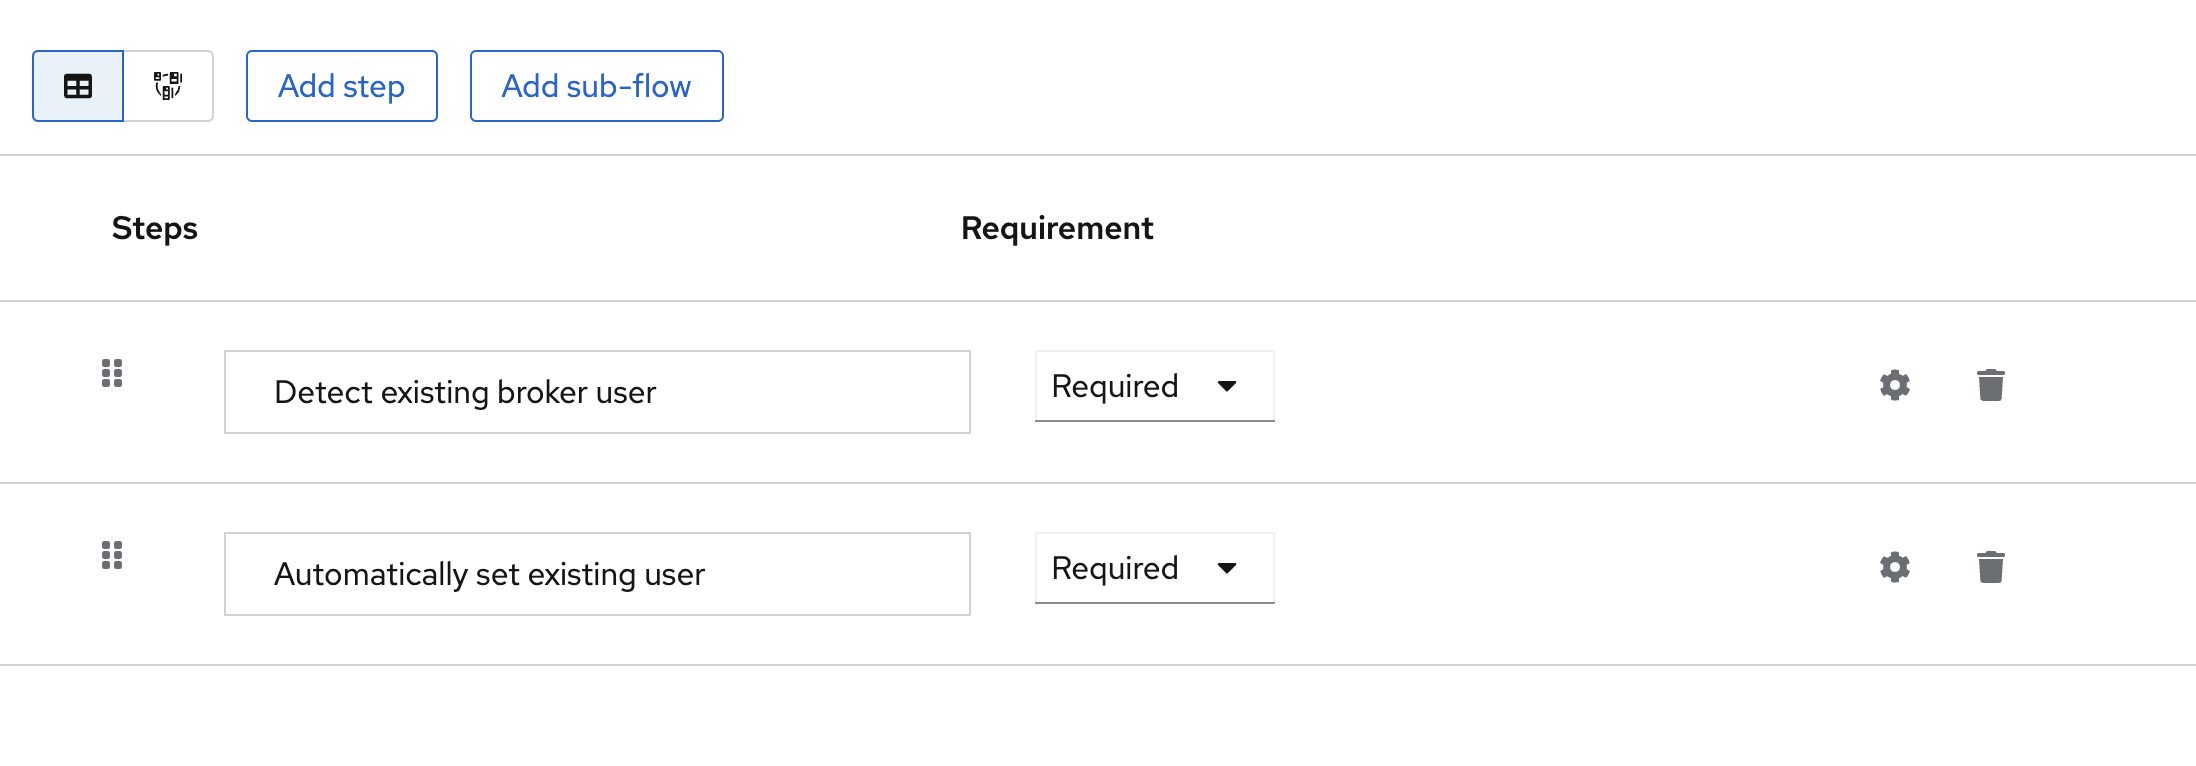
In Keycloak, go to Authentication and add a new flow.
- Click Create flow, name it (for example,
First login link). - Add the steps Detect existing broker user and Automatically set existing user, and set both to Required.
First login link
- Click Create flow, name it (for example,
-
Update the adfs provider you created earlier:
- In First login flow override, select the new flow (
First login link). - Set Sync mode to Import.
- Save the configuration.
tip
After applying the configuration, confirm that all LDAP users have been migrated and appear in Keycloak's Users tab. To verify, sign in via AD FS SSO and check that the Identity provider links tab now shows an ADFS link — that confirms the AD FS user is correctly linked to the LDAP user.
- In First login flow override, select the new flow (
Cloud: Prerequisites
You'll need:
- Microsoft Windows Server 2019 with AD and AD FS already configured
- A paid Cloud Pro plan or higher
Create the Server Application in the Application Group
In AD FS, open Application Groups and choose Add Application Group… from the context menu.
Adding server to adfs
Use these settings:
- Client Identifier: keycloak
- Redirect URI: https://sso.yuchat.ai/auth/realms/yuchat/broker/ADFS/endpoint
- Credentials: Generate a shared secret — save it, you'll need it later
Confirm and finish setup. The keycloak application appears in Application Groups.
Adding server to adfs - result
Create the API
Create a server API to control the token AD FS returns to Keycloak. Double-click keycloak in the Application Group folder and choose Add application….
Adding api to adfs
Use these settings:
- Name: keycloak - API (or any name you prefer)
- Identifier: keycloak (must match the Client Identifier from the server application)
- Access control policy: Permit everyone
- Permitted scopes: select allatclaims in addition to the default openid
The allatclaims scope copies every field from the AD FS access token into the ID token sent to Keycloak.
Confirm and finish setup. The new API appears under the keycloak server application.
Adding api to adfs - result
Configure Data Field Mapping
To map user properties in YuChat, configure field mapping. The required fields are email, given_name, and family_name. Because allatclaims already passes every field, these values are present in the ID token.
Open the keycloak server application and double-click keycloak - Web API. Switch to the Issuance Transform Rules tab and click Add Rule…. Use the Send LDAP Attributes as Claims template to forward the fields.
Use these settings:
- Claim rule name: Attributes (or any name you prefer)
- Attribute store: Active Directory
- Mappings:
- E-Mail-Addresses → email
- Given-Name → given_name
- Surname → family_name
The values email, given_name, and family_name aren't in the dropdown — type them manually.
Adding field mapping in adfs
You can add more attributes if needed. The mappings above are the minimum required for YuChat. They're used to generate a username automatically on first sign-in.
Complete Setup
To activate AD FS integration in the cloud, contact YuChat support.
Suggested message:
Hello,
We'd like to configure single sign-on (SSO) for YuChat Cloud via our corporate AD FS.
- Organization name
- AD FS endpoint URL
- Credentials: the shared secret generated in the Create the Server Application in the Application Group step
Send your request through the support portal at https://yuchat.ai/support or by email at support@yuchat.ai.